

Choosing Between PAR, BR, and MR Bulbs
March 4, 2024
High Ceiling Lighting Solutions for Houses of Worship
May 5, 2024
Stage Lighting Techniques
The Science of Stage Wash
Welcome to the exciting world of stage lighting, where the right techniques can make a performance shine. Our guide is for beginners and experienced lighting enthusiasts eager to enhance their skills.
We start with the essentials, showcasing how fundamental lighting is in establishing the atmosphere of any theatrical production. You’ll then learn about the concept of ‘wash’ in stage lighting – what it means, its importance, and the stunning effects it can create on stage. Skillfully applied front-wash lighting can drastically enhance performance, making it a memorable experience for the audience.
Fixtures and Positioning
Crafting a wash in stage lighting hinges on selecting and strategically positioning specific lighting fixtures to ensure optimal coverage and uniformity. Key among these are LEKO and Fresnel fixtures, each with unique characteristics suited to creating a wash. With their precise beam control, LEKO fixtures are ideal for focusing light on specific areas. In contrast, Fresnel fixtures offer a softer, more diffused light, perfect for covering larger areas without harsh edges.
Fixture placement is crucial; achieving a smooth wash requires careful consideration of both angles and distances. By adjusting these variables, lighting designers can ensure the light spreads evenly across the stage, eliminating shadows and highlighting the performance area to create a visually stunning, immersive experience for the audience.
Already Using PAR56 or PAR64 Cans for Your Front Wash?
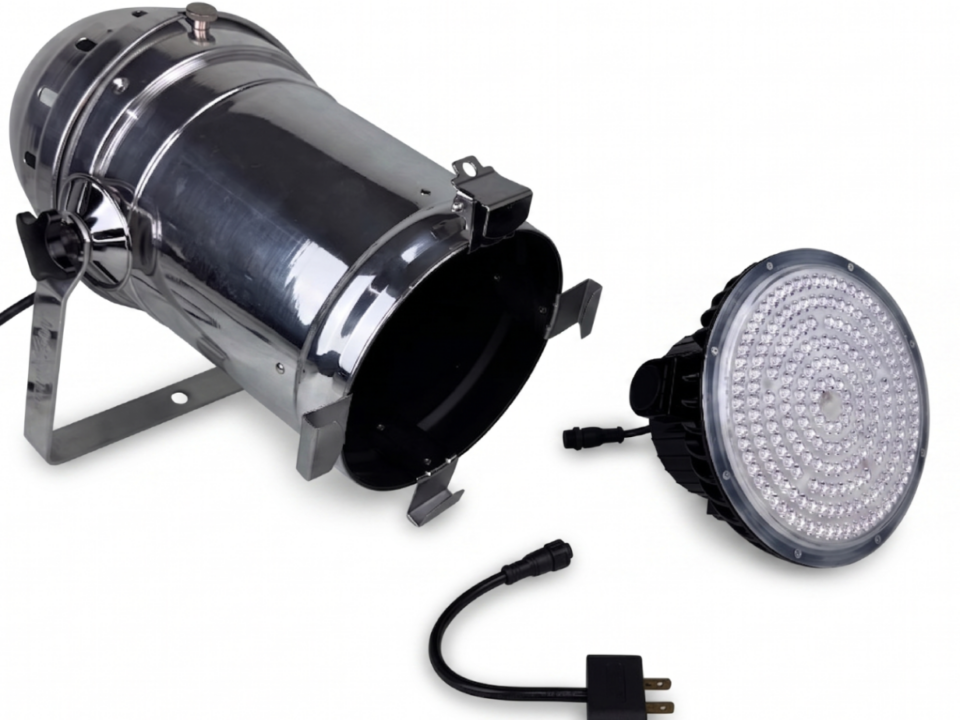
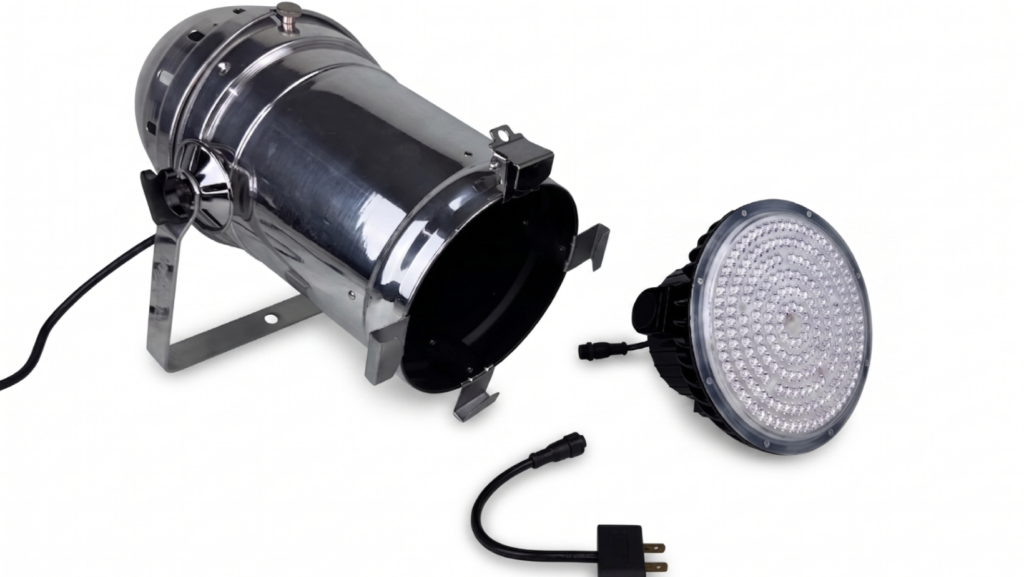
A front-wash upgrade does not always require replacing every fixture. If your existing PAR cans are suitable for continued use, compatible LED retrofit lamps may offer another option.
Start with the housing and connection you already have. Then evaluate beam coverage, output, fixture spacing, and dimmer compatibility. A PAR retrofit should not be assumed to duplicate every optical or control feature of a different fixture type.
Information to Gather Before Choosing Lamps
| Detail | What to Record |
|---|---|
| Stage area | Width and depth of the area you need to illuminate. |
| Existing equipment | Fixture model, current lamp, connector, and quantity. |
| Mounting position | Where the fixtures are located and how far they are from the target area. |
| Controls | Dimmer make/model and any important fading or recording requirements. |
These details provide a useful starting point for evaluating retrofit options; they do not by themselves constitute a completed stage-lighting design.
How to Set Up Perfectly
Dividing a stage into zones and deciding between focused or uniform lighting schemes is a strategic process that begins with analyzing the performance’s needs and the stage’s physical layout. Consider the types of scenes, movements, and the atmosphere you aim to create. A focused lighting scheme with tight, well-defined zones is ideal for a more dramatic effect with a clear emphasis on specific actors or props.
In contrast, a uniform lighting scheme with broader zones works best for general illumination or scenes requiring consistent visibility across the stage. Once you’ve planned your zones, mapping them on a stage plot helps you visualize their coverage and relationships.
Map the Stage: Create a detailed stage plot indicating the location of each lighting zone.
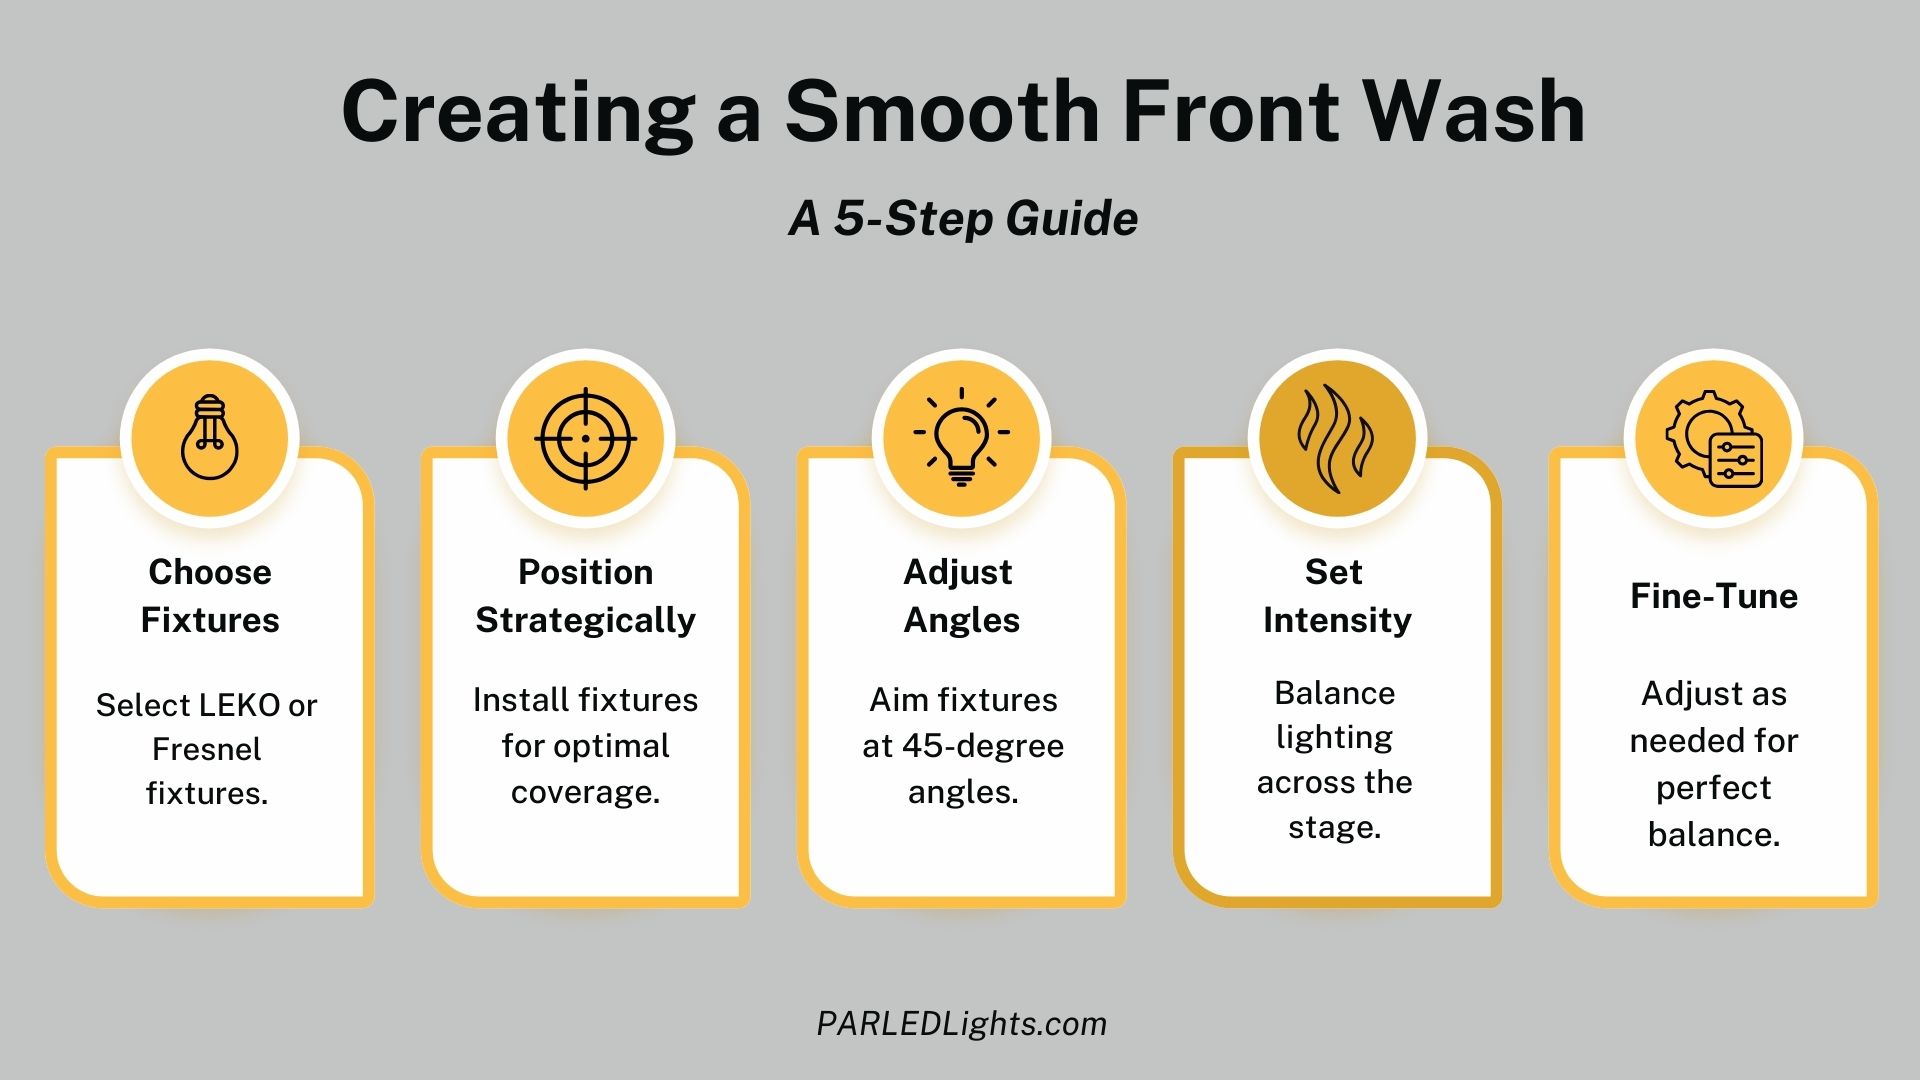
Select Your Fixtures: Choose fixtures or compatible retrofit lamps based on the required coverage, available mounting positions, and the characteristics of the existing equipment.
Position Fixtures: Install fixtures strategically to cover the designated zones. For focused lighting, aim fixtures directly at the specific points; for uniform lighting, space them evenly to cover broader areas.
Adjusting Angles: Evaluate aiming positions in the actual room. Check facial visibility, shadows, glare, and overlap rather than assuming one angle will suit every installation.
Setting Intensity: Start with a baseline intensity for each fixture, then adjust up or down to balance lighting across the stage. Use a light meter to ensure even coverage.
Fine-tuning: Watch rehearsals to see how the lighting affects the performance. Adjust fixtures’ positioning, angle, and intensity as needed for the perfect balance.
Advanced Techniques and Considerations
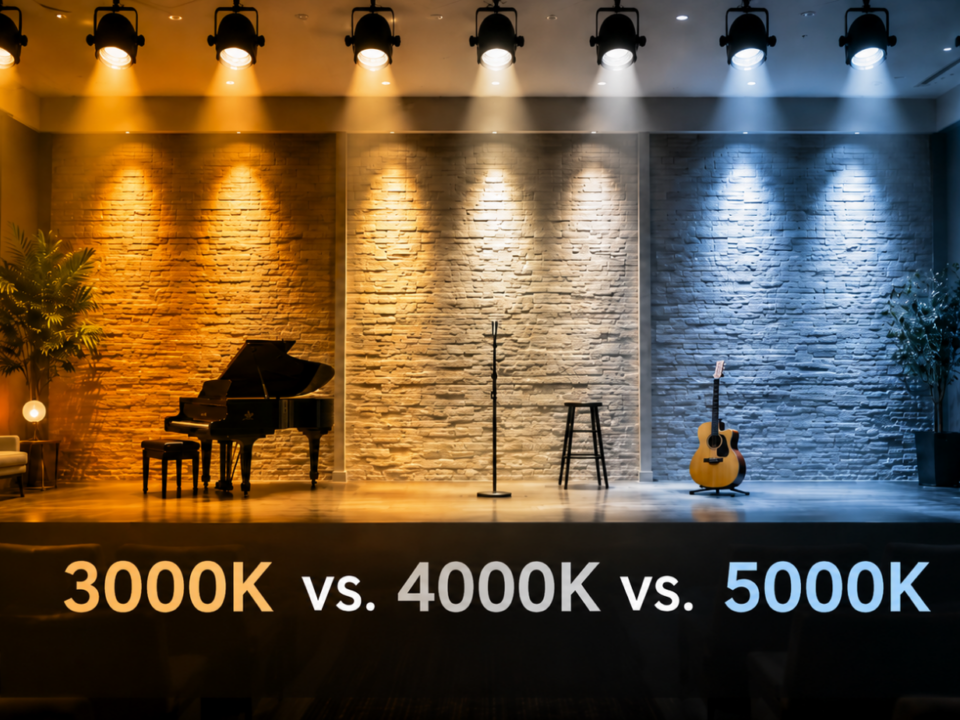
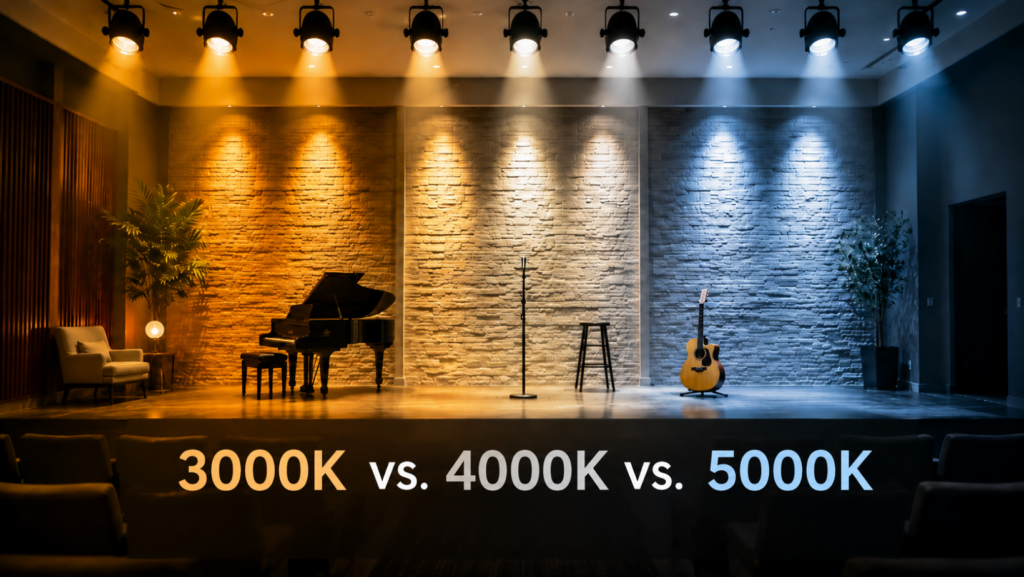
Leveraging color temperature in stage lighting is a powerful way to emotionally charge a scene; warm hues can foster comfort and closeness, while cooler tones might suggest sadness or distance. Integrating dimmers and filters becomes essential to achieve an even lighting intensity across the stage.
Dimmers let users adjust light levels smoothly to match the scene’s emotional tone, ensuring natural transitions.
Filters, on the other hand, can modify the intensity and spread of the light, guaranteeing uniform coverage without over-illuminated spots or unwanted shadows. Through careful experimentation and adjustment during rehearsals, these tools allow for nuanced control over the visual mood, enhancing the audience’s emotional experience.
Challenges & Solutions
Creating a front wash comes with its share of challenges, from uneven lighting distribution to color inconsistencies across the stage. However, these common issues can be effectively managed with the right strategies. Solutions include using a mix of fixture types to ensure a balanced spread of light, adjusting light angle and intensity to avoid shadows and hotspots, and using color correction filters to achieve a uniform color temperature. Additionally, using barn doors or gobos can help control spill and direct light precisely where it’s needed.
Through these adjustments, a front wash can significantly enhance performance, casting actors and scenes in the optimal light to convey emotions and themes powerfully, ensuring clarity and visual appeal that captivates the audience.
Combine Fixture Types: Use both LEKO and Fresnel fixtures to balance focused and diffused light across the stage.
Adjust Angles and Intensity: Fine-tune each light’s direction and brightness to eliminate shadows and even out hotspots.
Employ Color Correction Filters: Standardize color temperatures across different fixtures to maintain a consistent look.
Test and Re-Test: Continuously check the lighting effects during rehearsals to identify and rectify any issues before the actual performance.

Planning a Front-Wash Upgrade with Existing PAR Cans?
Tell PAR LED Lights about your existing fixtures, stage dimensions, mounting positions, and dimmer. We can help narrow down the PAR retrofit options to evaluate for your project.